
Boondock Camper and 4x4 Suspension Modifications
- Randy Reek, The Great Out There

- Jul 23, 2025
- 6 min read
Making the necessary suspension modifications on the cargo trailer camper and tow rig for boondock or off-grid camping.
I outfitted a cargo trailer for "boondocking" a few years back. My goal was to construct a self-contained camper that would withstand the abuse of backcountry camping, plus thousands of miles of cross-country travel just getting to my favorite locations.
The starting point for this project was a 7' x 14' cargo trailer. I special ordered the trailer with rear double doors instead of the typical ramp door designed for tractors of motorcycles. The rear doors still allow me to load my motorcycle using a separate ramp - after I remove the full-size bed.

I chose to build my boondocking camper from scratch using a cargo trailer simply for the added durability. I didn't want a cheap, stapled-together camper trailer. I also didn't want to pay for any of the contents I didn't need and only wanted a minimalist but rugged interior.
"Boondocking" is off-grid camping. NO services!
You carry your own water, supply your own power, and handle your own waste. Again, I didn't want to pay for the cheaply constructed cabinetry or bathroom fixtures in a camper. I didn't want the limitations and hassles of plumbing and holding tanks. Finally, I wanted to prioritize 12-volt lights, fans, and refrigerator - all tied into a custom solar array and controller with inverter.
I'd like to tell you that this is the cheaper option to a standard camper. But that isn't true. Building what you want from scratch is always more expensive than buying a mass manufactured model - especially with a glut of used campers available.
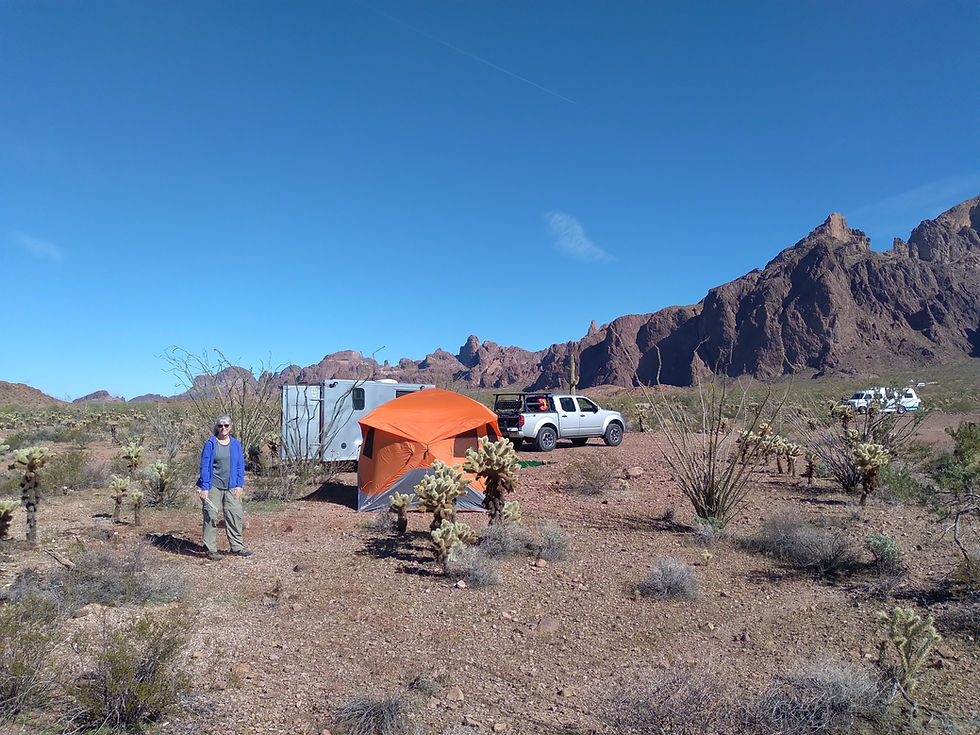
My priority was off grid camping destinations - including back roads accessible only by 4x4 that would destroy a lesser "highway" camper.

I won't cover the building process in detail in this article. I'll just admit that the construction was tedious. But the end result was a fully-insulated shell with two windows and a screened side door and rear doors, ventilated by a Max Air roof fan.
I built a custom countertop across the front of the camper with storage below for all our kitchen needs and a sink plumbed to a foot pump. The side pantry includes a fold-down table. In the lower compartment is the solar controller, wired to the house battery and 12-volt and 120-volt outlets.
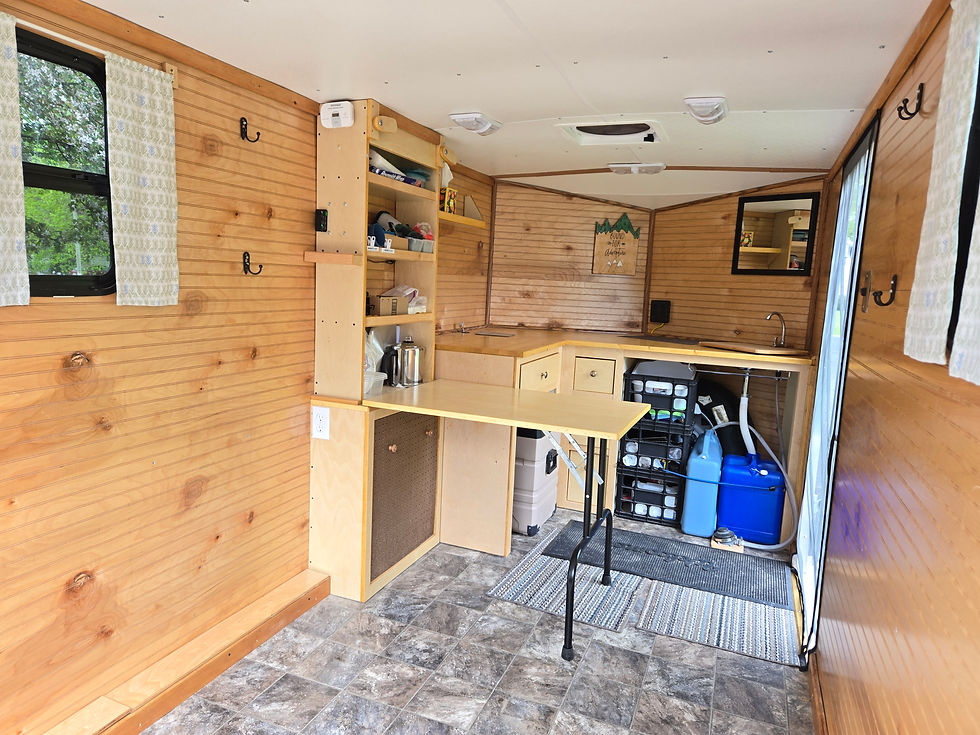
The full-size bed forms a couch when the table is in use. The table is folded out of the way when the bed is extended for sleeping. (The floor plan is either eating/lounging or sleeping - with no wasted space.) The folding bed platform can be completely removed if I need to haul something large in the trailer, but it also allows for hauling camping gear and my bike in the rear "garage" space inside the back doors.
I purchased the 7' x 14" trailer because it was the largest that I wanted to tow with my V6 Nissan Frontier "midsize" pickup. The truck has a high towing weight range, but the wind resistance of a cargo trailer or camper is an equal concern.
The Frontier "Crew Cab" has a short 66-inch cargo bed. The designers assume that most owners are only going to haul golf clubs, a cooler to the beach or a few bags of mulch. Consequently, the rear springs are woefully inadequate for any heavy load.
Despite my truck having the factory towing package, I was constantly annoyed by the sagging rear end when hitched to the trailer. Oncoming vehicles also signaled their irritation with my headlights shining in their eyes.

On my silver "Gen 2" Frontier, I had a set of generic add-a-leaf springs installed in the rear pack. This gave me the added weight carrying capacity to offset the tongue weight of the trailer. But the stiffer springs increased the harshness of the ride, especially when bottoming out on the small stock bump stops.
The suspension solution was installation of a set of Sumo Springs, by Super Springs International.
These polymer "springs" replaced the tiny factory bump stops. When unloaded, there was a 1-inch gap above the Sumo Springs and the truck rode smoothly on the leaf springs balanced by the Pro-4X Bilstein shocks. As soon as any weight was added to the truck bed or hitch, the Sumo Springs supported the truck frame and added progressive resistance.

The Sumo Springs eliminate hard bottoming out on rough roads and trails. The polymer springs also add to the weight handling of my Frontier, especially when towing.
In 2024 I upgraded to the Gen 3 Nissan Frontier Pro-4X. While other manufacturers were discontinuing their proven V-6 engines for turbocharged 4-cylinder engines in the quest for better fuel mileage, Nissan introduced a new V-6 that was paired with a new transmission. The new V-6 is slightly smaller, but puts out more horsepower. The fine-tuned 9-speed transmission also increased the tow rating. Amazingly, the new truck gets at least 25% better fuel mileage - and I couldn't be happier!
This time around I found All Dogs Offroad, and they supplied a suspension kit that added more weight capacity with an additional rear leaf. I also had new front coil springs installed that didn't add weight carrying buy simply added an inch of height to level the truck.
Like before, I then installed a set of Sumo Springs to both add carrying capacity and ensure the smoothest possible ride when towing.
I'm happy to report that the combination of added, stiffer springs and the ride management of the Sumo Springs is a WINNER! A recent trip to the Badlands of South Dakota put the suspension to the test in gale force winds and on twisty roads in the Black Hills.
This video illustrates how Sumo Springs stop roll and the bounce from stiff springs:
But as soon as I had the truck suspension dialed in, I became completely dissatisfied with the suspension on the cargo trailer camper. The cargo trailer has the springs and axle for a 3,500-pound GVWR. The furnishings and contents of the trailer are far less than this.
Cargo trailers (and most utility trailers and campers) do not have shock absorbers. A smooth ride requires suspension modification!
With stiff springs, the trailer transmits a hard jolt with every bump. If you encounter a washboard section, the trailer can bounce repeatedly, jerking the tow vehicle, and become a safety hazard forcing you to slow down below the speed limit. The rapid, repeated hopping and shaking is not only uncomfortable for the tow vehicle occupants but destructive for the trailer and contents.
So - once again - the solution was the installation of a set of Sumo Springs on the cargo trailer camper.
These Sumo Springs are bolted above the trailer leaf springs. Unlike the truck models, these Sumo Springs are designed to be taller than the existing gap above the trailer leaf springs - adding preload to the polymer springs and providing full-time weight management.
The Sumo Springs for trailers are supplied with three optional spacers to arrive at the correct stack height. You jack up the trailer to unload the stock leaf springs, then bolt the taller Sumo Springs in place.

In the case of my trailer, the unsprung gap was too short for the smallest stack of Sumo Spring and mounting bracket. (The lightest trailer Sumo Spring is intended for installation with a minimum gap of 6-inches above the leaf springs - but my trailer had a 5.25-inch space.)
My only solution was to slice off one section of the polymer spring, and then add one of the spacers to arrive at the optimum total height. I had to sacrifice some of the polymer spring carrying capacity, but weight carrying was not my main concern - achieving a smooth ride was the goal.
The finished trailer Sumo Spring installation looks like this: (Note the compressed, preloaded Sumo Spring below.)

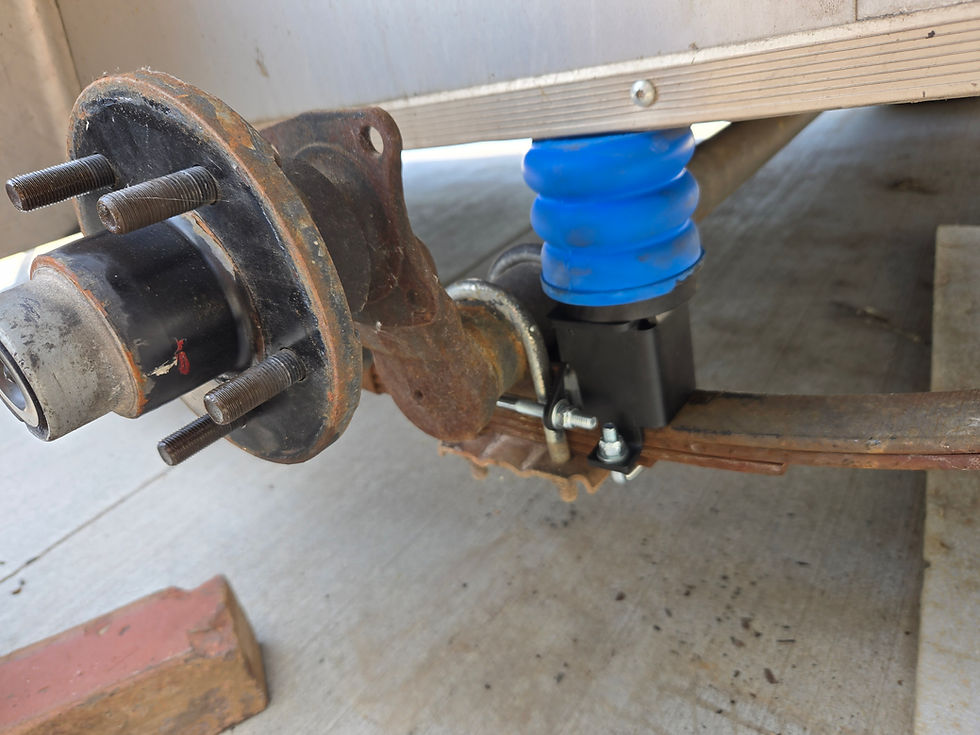
The bottom photo shows the installation of the two U-bolts to the mounting bracket - one around the leaf spring U-bolts and the second from the bottom of the leaf springs. While not mentioned in the instructions, I found it impossible to complete the installation on my trailer without removing the trailer wheels.
The final modification of my trailer was the installation of a new set of radial tires - one size larger than stock, 22575R15. The larger tires added an inch of clearance.

I now have a combination of an offroad capable tow vehicle and boondocking trailer. The combo is NOT intended for hardcore rock crawling, just providing access to the desert destinations when we fly away to the Southwest with the rest of the Snowbirds. Making these suspension modifications has made both boondock camping and towing to these remote destinations a pleasure!

I'm SOLD on the benefits of Sumo Springs for any serious 4x4 owner. After experiencing the improvement in the ride and carrying capacity, it was an easy decision to upgrade my boondock camping trailer with a set of Sumo Springs, too!
Check out Sumo Springs for your applications at Super Springs International. Click HERE for more information!


Comments