
NEW Tires and Wheels for the Roxor - Plus Fender Flares
ROXOR: New Tires AND Fender Flares!
The Mahindra Roxor is a one-of-a-kind utility vehicle! The Roxor combines the nostalgia of the MB Jeep with the latest diesel technology, from the world's largest manufacturer.
There is no other utility vehicle that offers the strong steel body and frame, rugged suspension, and powerful and economical Mahindra turbodiesel engine. The bullet-proof manual transmission and geared transfer case will outlast DOZENS of CVTs and rubber belts!
In the previous article I covered the UPGRADE to new 15" x 8" wheels and larger 31" x 10.5" tires with a more aggressive tread for off road.
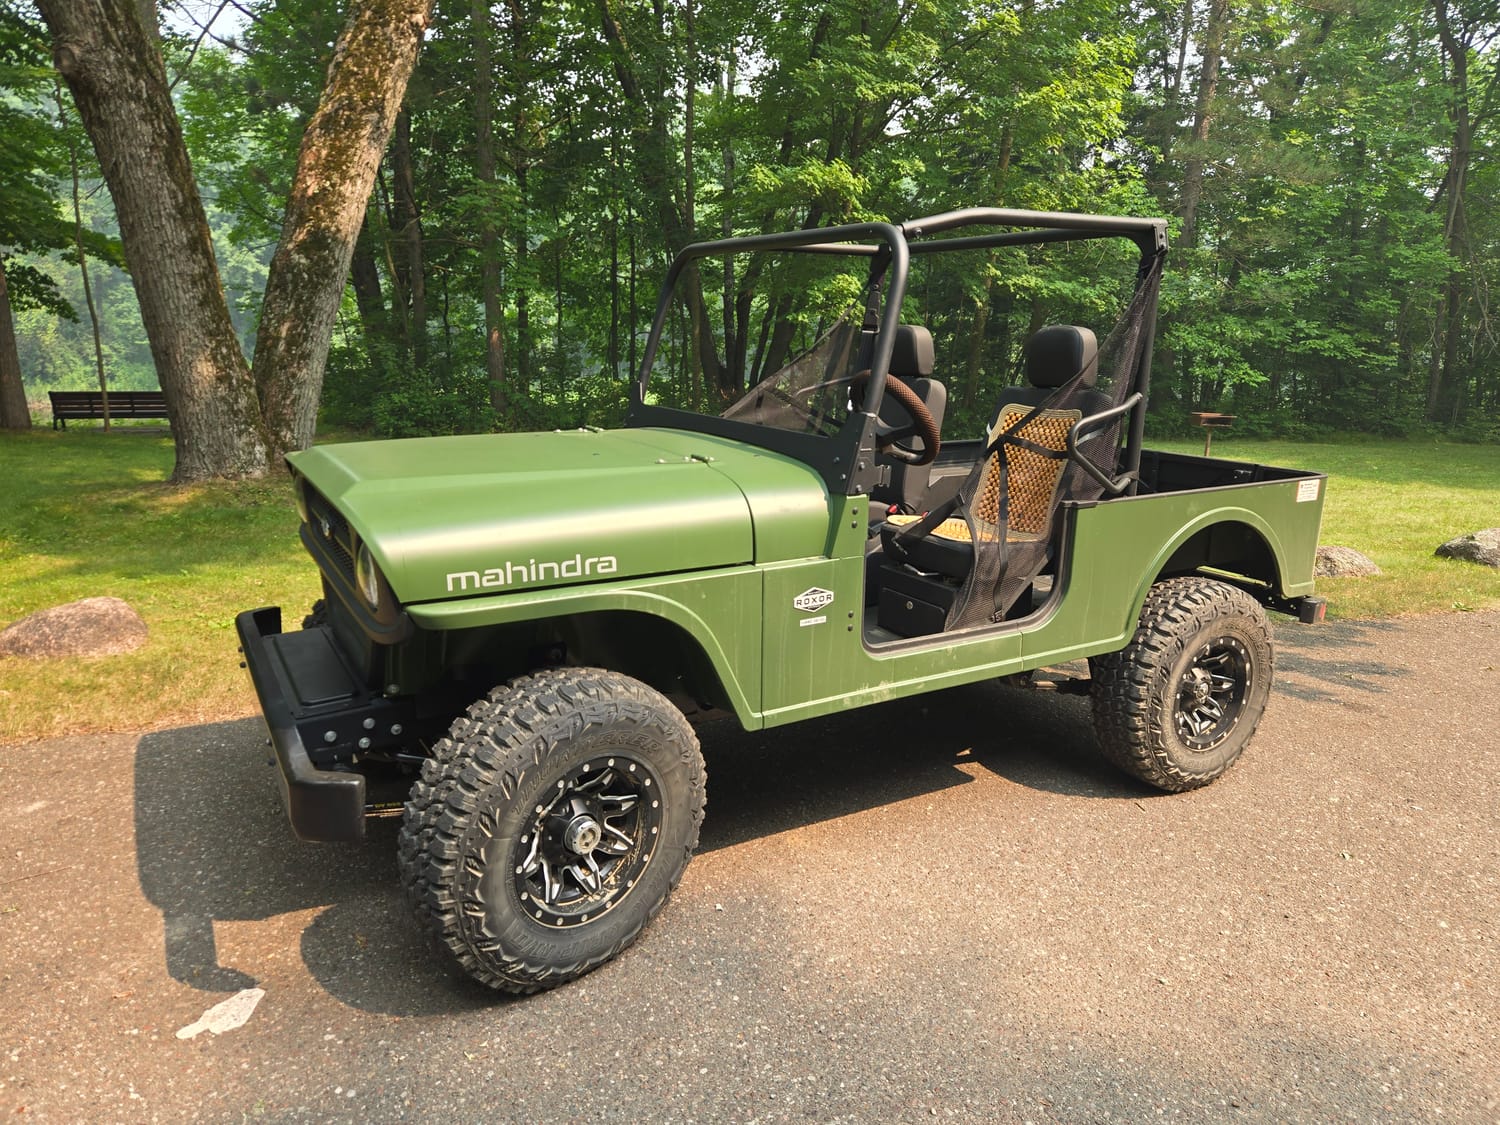
Roxor with NEW 15" wheels and 31 x 10.5 Thunderer tires!
The Roxor is equipped with great 235/70R 16 all-terrain tires on deeply offset steel rims (or aluminum rims for the "All-Weather package.) These stock rims keep the vehicle width close to 60-inches. If you installed wider tires on the stock rims it is necessary to also install 1.5" wheel spacers to prevent rubbing on the fenders, tail pipe, etc.
I decided that the best option was a set of new wheels, with the correct offset and 15" x 8" size. These new Fuel black aluminum wheels were paired with a set of Thunderer 31 x 10.5R15 tires.
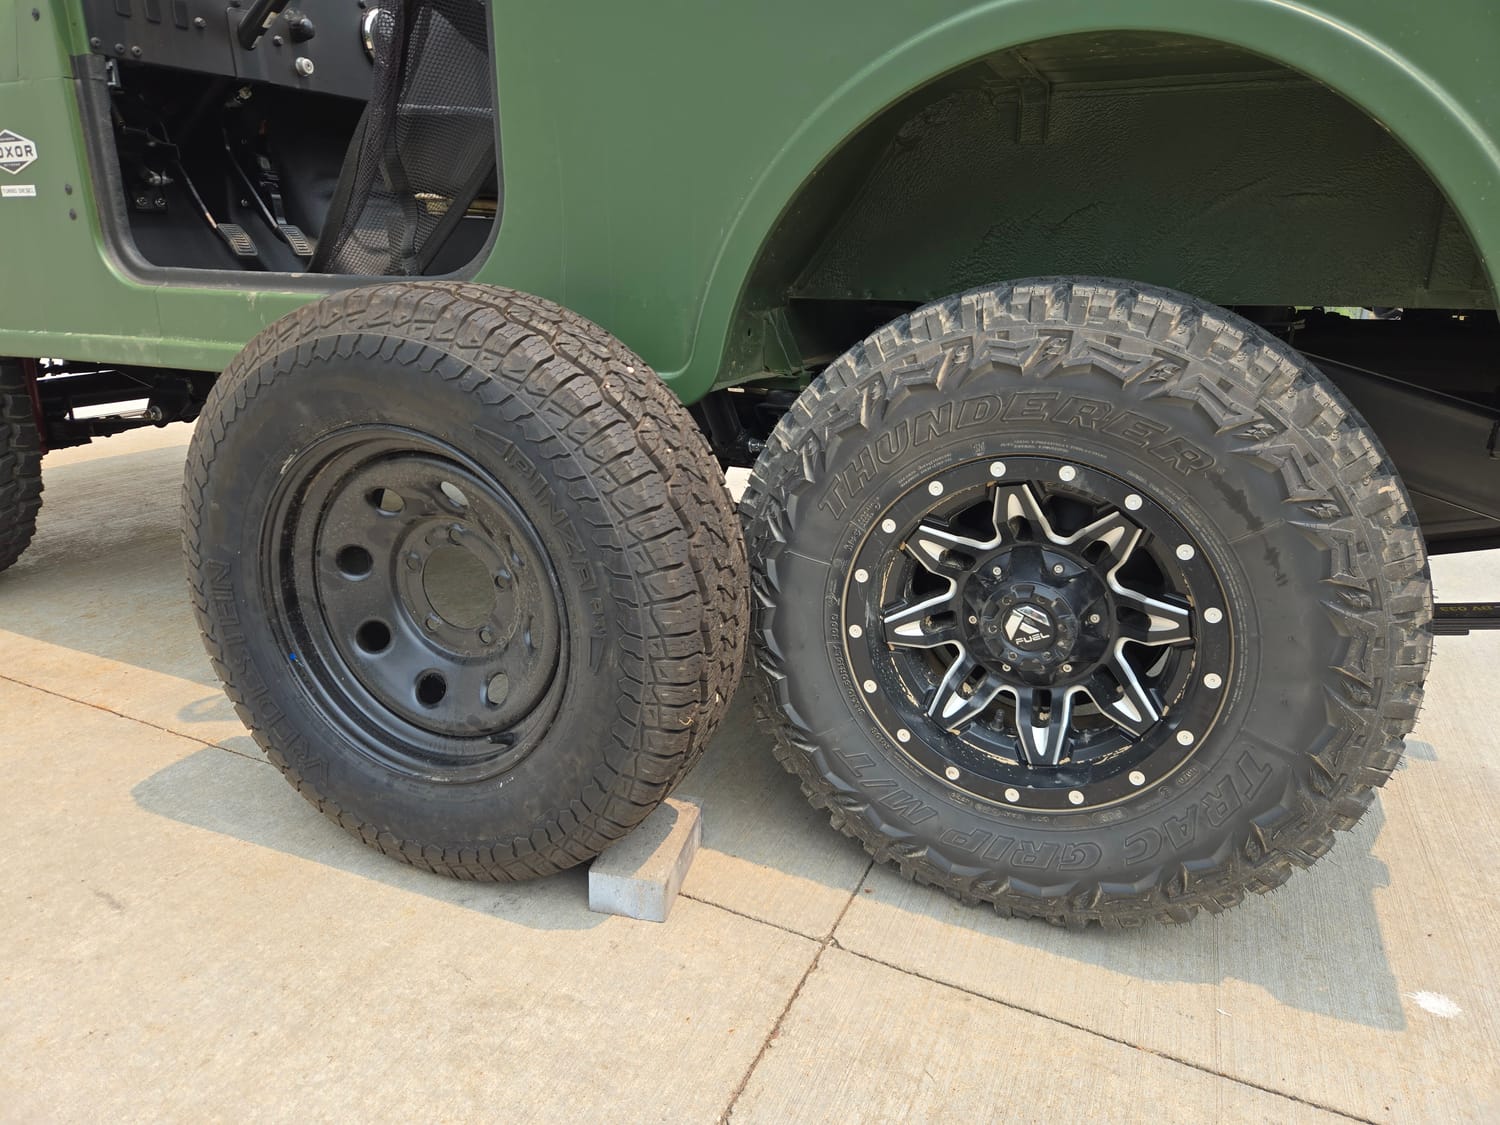
Stock 235's versus the new 31 x 10.5 x 15 tires and wheels
The larger tires immediately provide a better ride on the stiff suspension. Future articles will cover the modifications I made to the base Roxor suspension to match my riding destinations.
No matter if you use the stock rims (with wheel spacers) or switch to wider rims (as I did), the result is the same: the new tires will extend past the sides of the Roxor
The Roxor is unlike any work or sport utility vehicle on the market. It is a hybrid that splits the categories of Jeeps and UTVs - with the best features of both! But this also means that very few "Jeep" parts fit the Roxor. This is the case with fender flares - so every option will need to be modified.
Solution: Add Fender Flares to the Roxor!
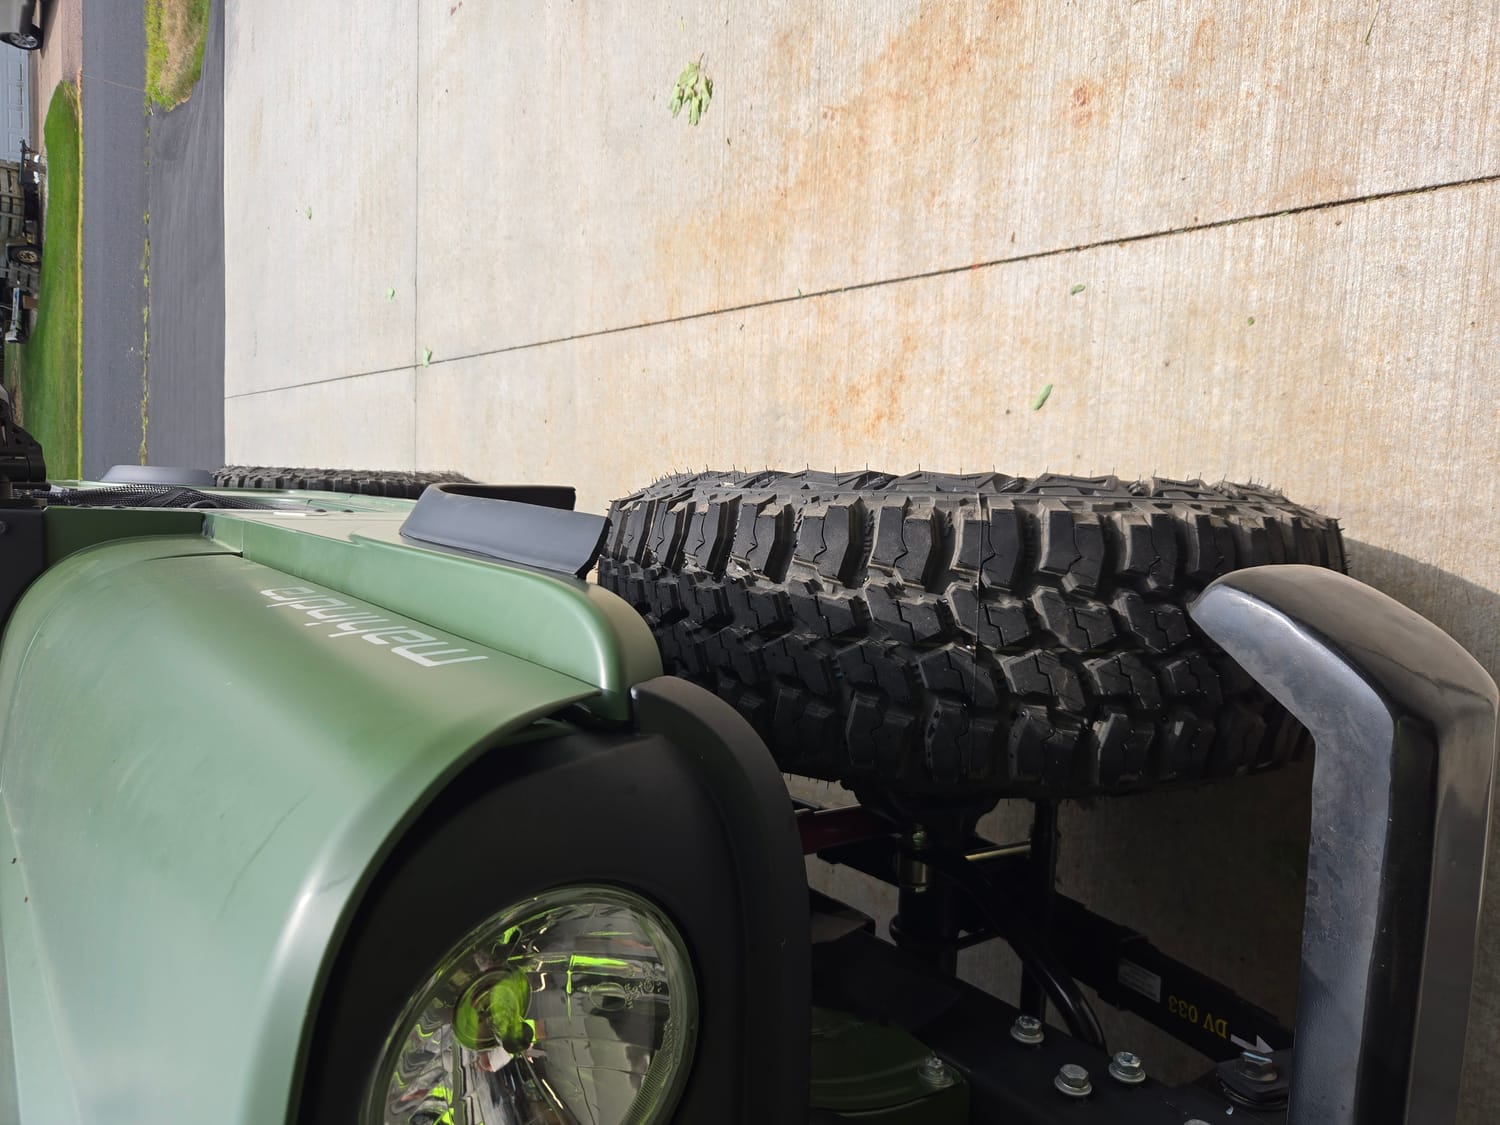
2-inch fender flares cover the wider tires on the Roxor.
There are a few options available, including fender flares for older Jeep Wrangler models. NONE are a direct fit. MOST require trimming and then dozens of bolts and/or screws. I chose not to use these to avoid piercing the Roxor paint and exposing the steel body to the nasty Wisconsin elements!
My choice was a compromise: I selected a glue-on "universal" option. These flares are also NOT heavy-duty and will be destroyed if I sideswipe a tree or boulder. But, I am NOT a hardcore rock crawler or brush buster. These soft rubber flares will serve the purpose of covering the exposed tires, reducing mud in the cab and satisfying any nitpicking highway officer.
The coverage is exactly what I hoped for. The installation of the fender flares took less than 30 minutes. There were ZERO holes drilled in the steel Roxor body. And the price was less than one-third the other alternatives - which also would not have been a 100% perfect fit!
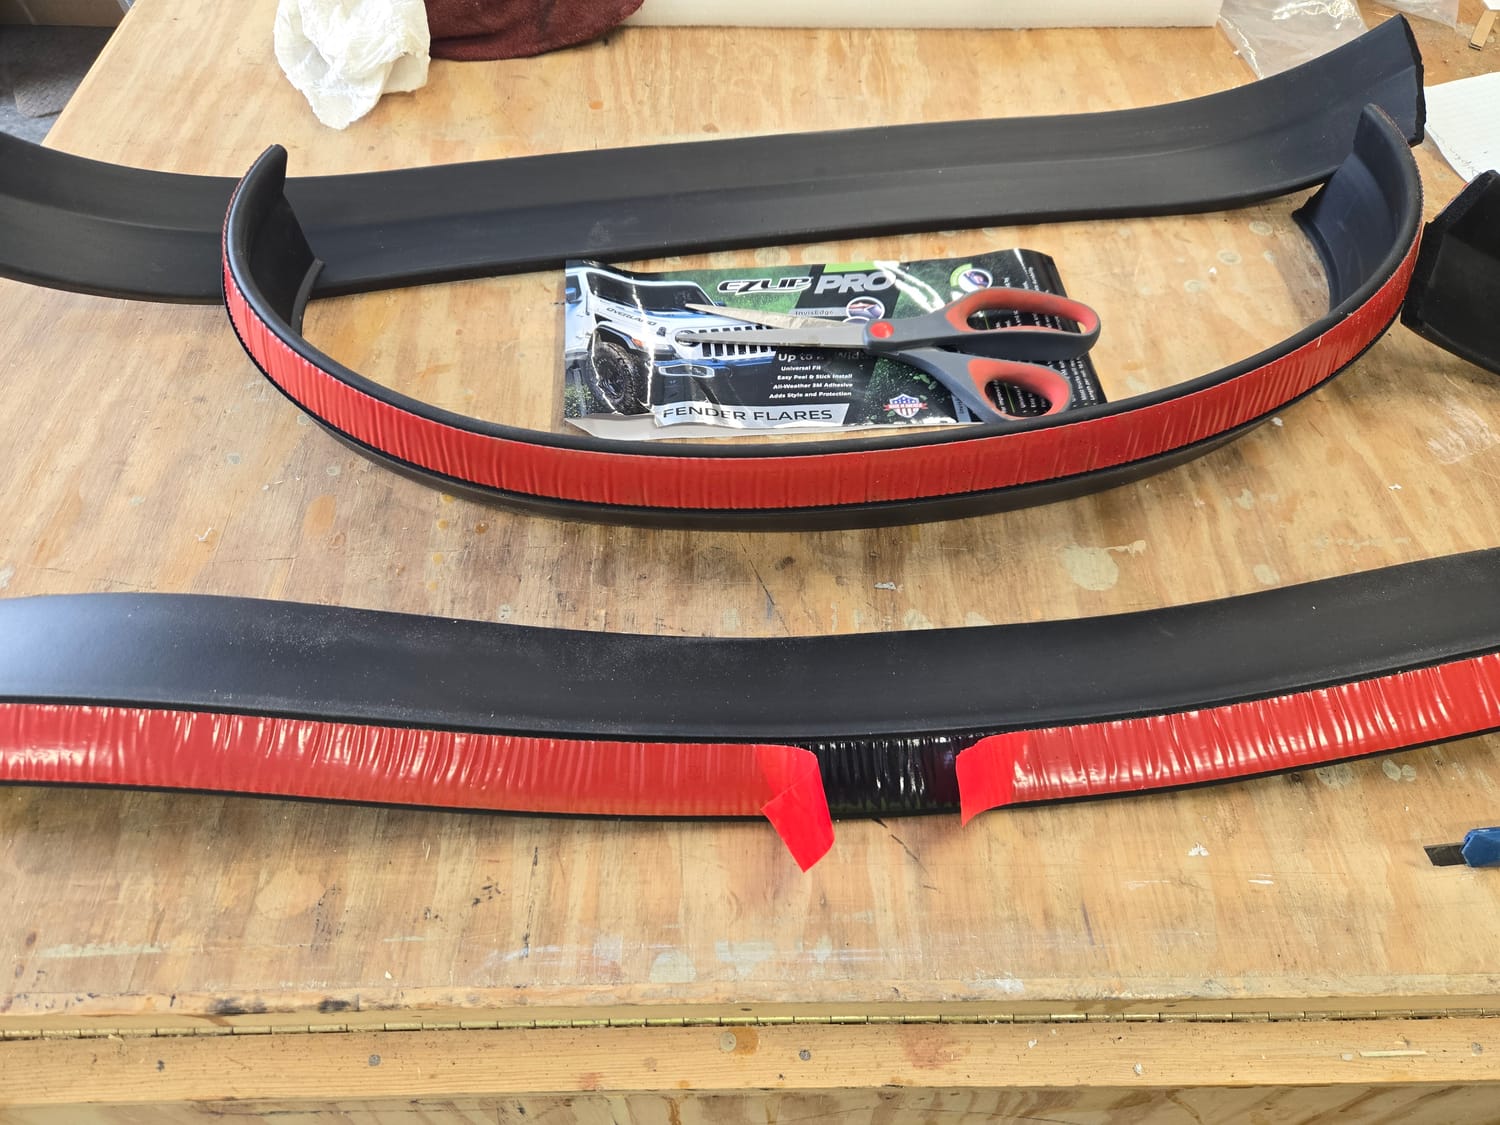
Fender flares cut into FOUR equal pieces.
The fender flare package contains 126" of material. The package warns that MOST trucks will require TWO packages for 100% coverage on four wheels. Because I regard these flares are "disposable" and anticipate replacing damaged flares regularly, I decided to make the 10'6" material go as far as possible.
First, I washed the fenders with soapy water. Then I wiped the inner lip with denatured alcohol to remove every trace of dirt and oil.
I simply folded the material and cut the length of flares in half, then in half again. I ended up with four pieces about 31.5" long.
Staring at the rear wheels, I folded the pieces in half to find the center, then slit the adhesive backing. Eyeballing the top, dead center of the wheel well, I applied the fender flare working outward to the ends. After applying finger pressure to the adhesive, I used a soft rubber roller to get 100% adhesion. (The instructions state that you should allow a few days for a permanent seal to form.)
As shown below, the fender flare is as wide as the tire, but stops short of the full length of the wheel well. As I said, this is the low cost alternative...
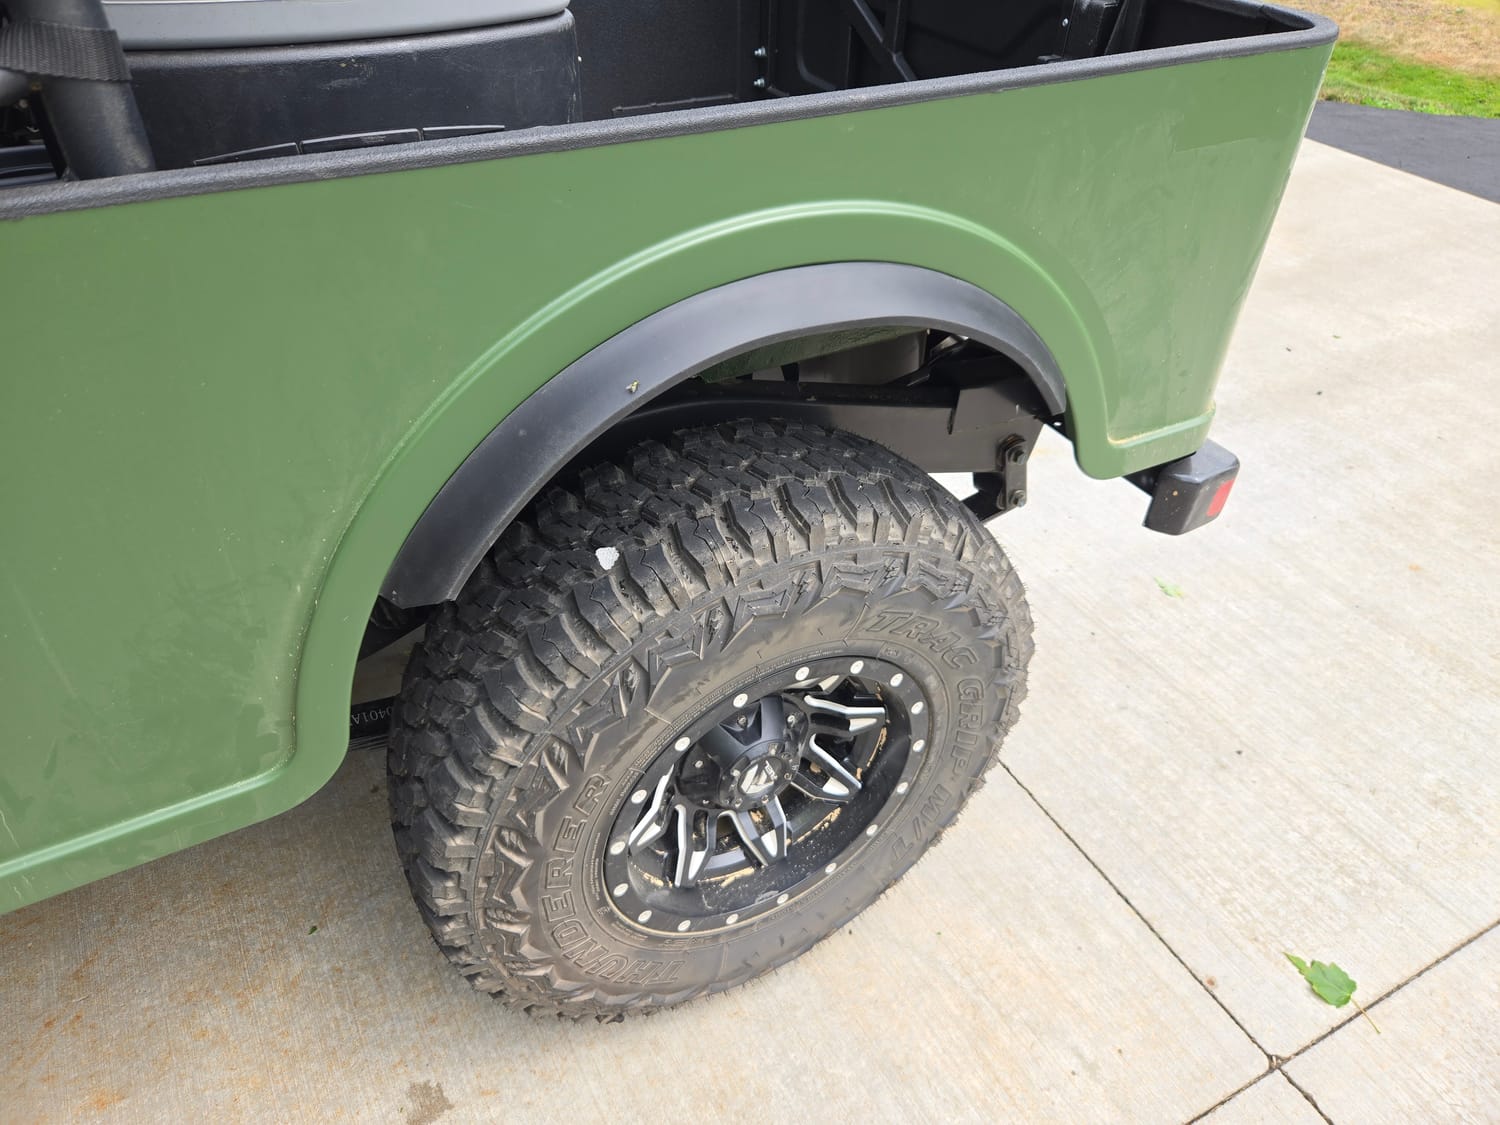
Soft rubber flare on Roxor rear wheel.
I then installed the flares on the front fenders. Here I started at the last forward edge of the straight fender, then worked my way around to the rear. Again, I ran out of material before reaching the bottom of the wheel well, but 95% of the tire is covered.
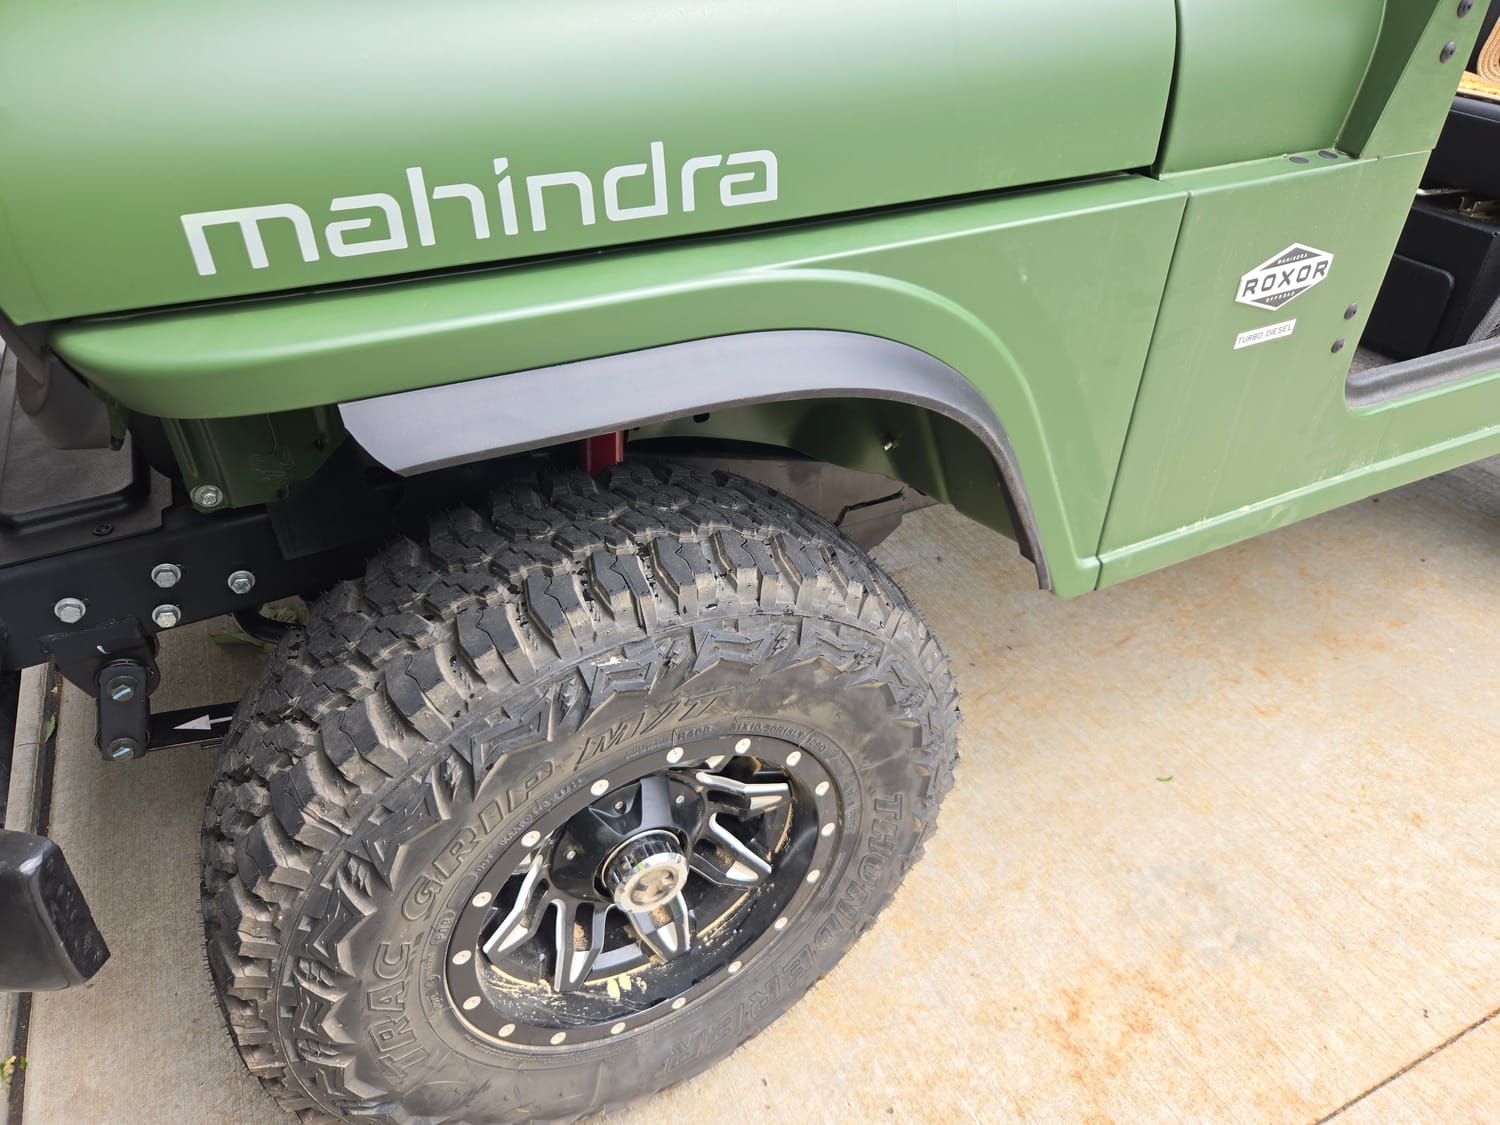
Soft rubber flare on Roxor front wheel.
I would never consider starting any overland adventure without a spare tire. I installed the Roxor spare tire mount that is designed for the tail gate. Then I mounted the spare tire - which is a matching larger 265/75 x 16" Thunderer tire on the original black steel rim. The final touch was adding a Compass spare tire cover that matches the theme of my Roxor!
My Roxor now has superior tires to any light-duty UTV, plus a spare. These tires will last 50,000 miles - at least 10 times more than any UTV!
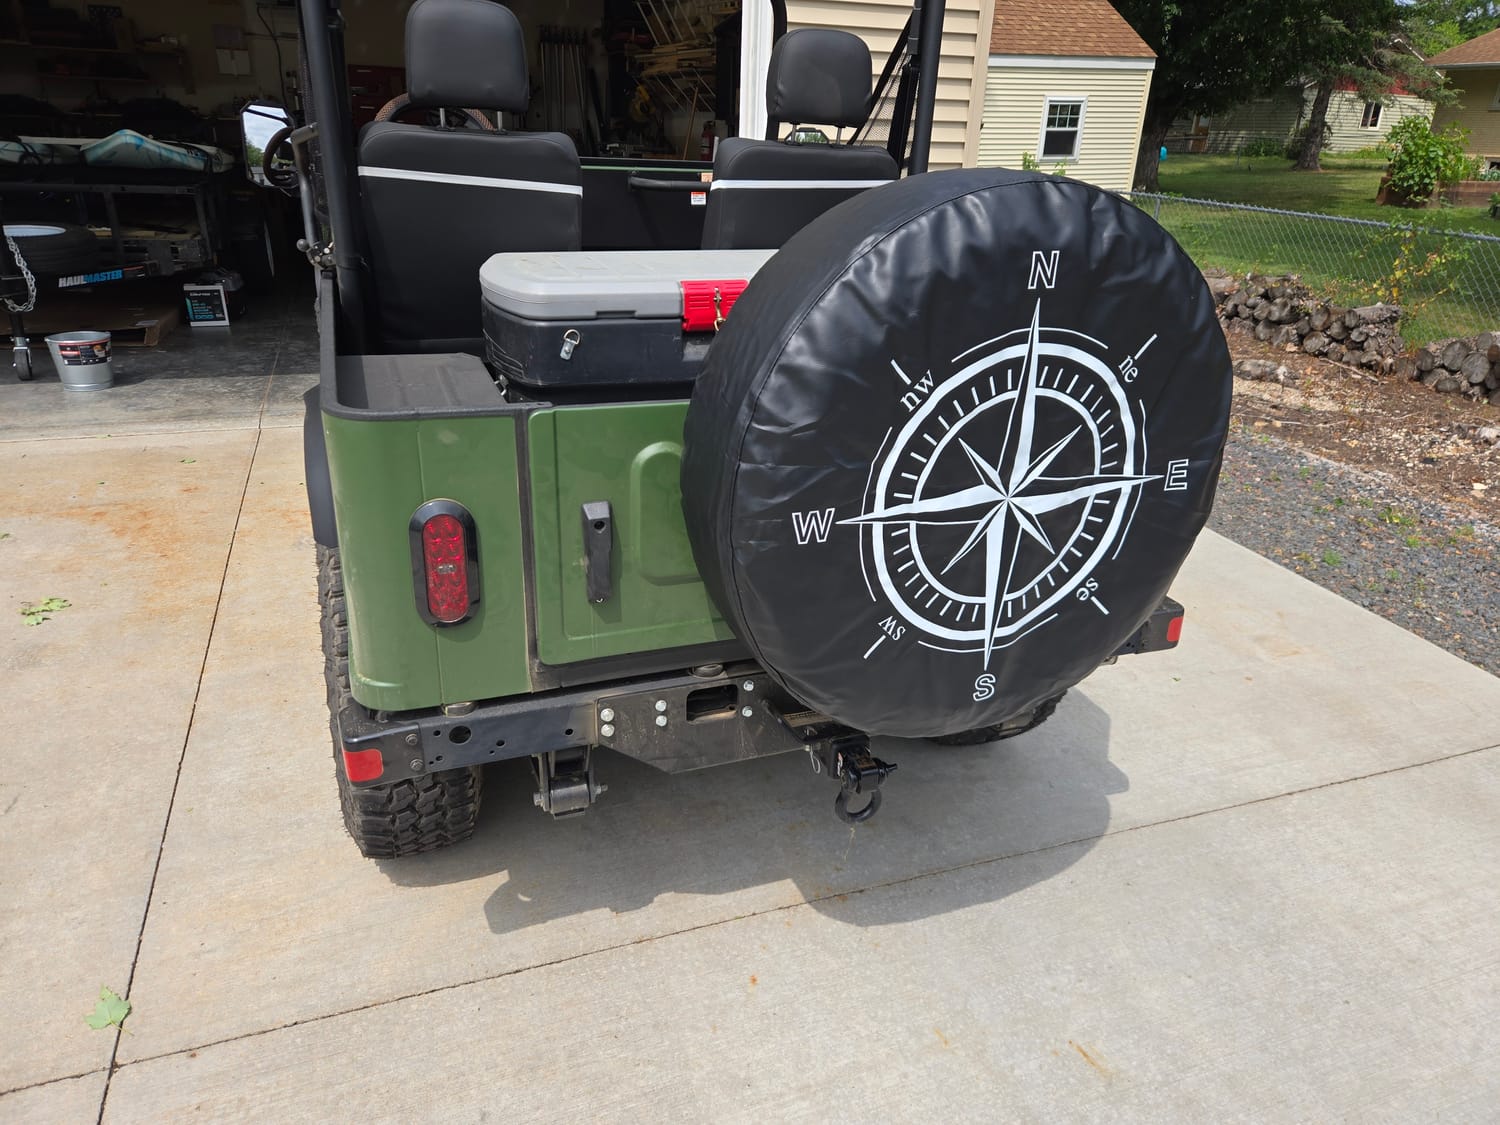
Roxor 265/75 x16 SPARE tire with Compass cover!
This is the level of performance and dependability that I REQUIRE for my overland "dream trips" of 1,000 miles and more!
What modifications have you made to YOUR Roxor?
What do you think? Would a Roxor meet your off road and overlanding requirements. Or is a lighter, more nimble SXS a better match.
Please follow The Great Out There on Facebook and Instagram, Pinterest and YouTube - then leave your comments. Share with your friends. Subscribe to our channels for guaranteed access to future Great Out There content!!!

Recent Posts