
Kawasaki KLX300 ADV Lite Build: Handlebars, Grips, Guards and MORE!
- Randy Reek, The Great Out There
- Dec 9, 2025
- 5 min read
Updated: Dec 13, 2025
An ESSENTIAL upgrade to the stock KLX300 in the transformation into the ADV Lite touring motorcycle!
I have owned over a dozen dual-sport motorcycles. Without exception, the most expensive Japanese and European brands cut corners on parts like foot pegs and handlebars.
I understand that the MAJORITY of dual sport motorcycle buyers will never push the limits of their machines, and never rack up long-distance "adventure" mileage. Most riders don't mind the cheap handlebars and foot pegs. Most buyers of these motorcycles enjoy short outings. Most ride around town, the farm or the campground.
This means that anywhere the brands can save a buck, they WILL!
But "adventure" motorcycles push the limits. It's not IF your cycle will get dropped - it is only WHEN. And this will occur in the roughest, downhill section while carrying a load.
Over the years, I have owned SIX dual sport motorcycles built in China plus TWO built in India. ALL were delivered with excellent aluminum handlebars and foot pegs suited for their intended usage.
This article covers the installation of new handlebars on the Kawasaki KLX300 ADV Lite motorcycle.
This is NOT a cosmetic choice. The new aluminum handlebars are actually stronger AND lighter than the stock mild steel bars! But the MAIN reason for the replacement is the installation of the REQUIRED ADV accessories, especially full hand guards.
The stock steel handlebars have welded caps at the ends which prevent the installation of the hand guards! Some riders have drilled out the bars, or cut off the ends of the bars - but this is a waste of time and an imperfect solution. So let's start from scratch:
First, I ordered a set of Tusk aluminum handlebars. Instead of installing risers on the fork mounts, I selected a "high" height bar to make rising while standing more comfortable.

After removing the old bars, I installed the new Tusk handlebars along with the mounts for my windshield. This small screen is unnecessary for trail riding, but a great addition for long days on back roads, especially to deflect bugs and rain from my face shield and GPS. I have tried screens that clamp to the handlebars, but never found these to be as sturdy as the one shown. The mounts that support the arms of the KLX300 windshield simply replace the top bar clamps to the forks.

When you remove the "switchgear" (right throttle control and left light, horn) you see that these are positioned on the handlebars by small studs that fit into holes in the bars.
It is necessary to drill matching holes in the new bars. You can drill these holes before installing the new handlebars. I prefer to install the new bars and get them positioned and leveled to my taste, then mark and drill the holes. You simply measure the old bars, inward from each end. It is also helpful to wrap the new bars with some painter's tape, then position the switchgear and press the stud into the soft tape. This helps double check the location. A sharp bit easily drills the required hole in the new aluminum bars.

Next, I installed the Oxford Heaterz heated grips. I consider heated grips to be MANDATORY on all my adventure motorcycles. I can't be warm and riding safely if I am chilled! Heated grips are not just for freezing conditions, but are FANTASTIC for moderate temps and riding in the rain!
These are the "intelligent" grips that include a sensor which turns them off if you forget. You can turn them off manually, but after the engine is turned off, the lack of vibration signals the sensor to turn off the grips. Because the heated grips are wired directly to the battery, this eliminates killing the battery overnight or a during stops along the way.
Sometimes you can just peel off the old grips. The throttle grip was glued on and required some extra effort to slice it off. You also need to sand off the ridges on the throttle tube before sliding on the new heated grips. Position the grips so the wiring doesn't interfere with the brake or clutch lever stroke.

Quick Tip: Oxford STRONGLY urges you to connect all the components and test them BEFORE installation. These grips are permanently installed with Super Glue - so it is TOO late after installation to find out a grip or the controller is defective!!!

The grip installation is completed by attaching the control to the handlebars. Using the longer bolts included, I attached the mount to the left clutch lever base. Then you need to connect the three wires, which have three waterproof sockets for each grip and the controller to the power lead from the battery.
I also exchanged the stock long levers for shorter adjustable levers - in black, of course. I like being able to adjust the reach of the levers, especially when I need to wear thicker gloves. I have never broken a lever after installing hand guards (if positioned properly), but after installing the new levers, the old levers become spares that I pack along on extended tours.

With the grips and levers installed, you can then install the hand guards. Hand guards add wind protection to make the heated grips more effective. The main function is to protect the levers in a crash. With the new handlebars installed, the hand guards attach at the ends and in the center, just past the controls. I needed to bend the inner mounting bar slightly to make everything line up perfectly.
I removed the stock round mirrors and installed the adjustable, folding ADV mirrors. These use RAM ball mounts on the lever bases and are infinitely adjustable. Adapters are included to install in the stock mirror bases.

The round ball mounts are both strong and shock absorbing. I now use similar RAM ball mounts for my Garmin Zumo GPS and phone and cameras. I replaced one of the windshield mounts with another RAM ball for my video camera. On the trail I can also remove one of the mirrors if I want another mounting location for a different camera angle.
It can't be seen in the photo above, but I also installed a USB outlet on the handlebar crossbar. The right RAM mount is sometimes used for my phone if I am following GPX tracks. This rugged phone is plugged into the USB outlet (wired direct to the battery) and is on all the time for navigation. Otherwise, for routes on paved and gravel roads, I mainly use the Garmin GPS on the left - which is also hardwired to the battery.
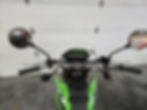
Here is a walk-around view of the completed installation of the handlebars, accessories, and other ADV essentials on the KLX300 ADV Lite cycle:
ADDED benefit: the black anodized handlebars, windshield mount, hand guards, levers, and other parts compliment the other ADV Lite accessories and offset the in-your-face neon green of the stock KLX300! After installing all these black parts, I decided a black front fender would complete the build!
Here is the full list of KLX300 ADV Lite accessories covered in this article:

Not part of the handlebars, but also mentioned in the video is the added foot on the kickstand to prevent sinking out in the back country:
What else have you added as functional UPGRADES to your ADV bike? Please comment below, and Subscribe to receive notice of new update on the KLX300 ADV Lite build series!
